(Advantage Services) icon
(on the desktop) to turn on the Advantage Services. The
(Advantage Services) icon
(on the desktop) to turn on the Advantage Services. The  icon will
now be in the
icon will
now be in the
|
The Google Calendar allows for the option to synchronize the Webvantage Calendar with Google Calendar. Calendar syncing (two ways) is automatic through Advantage Services/Google Calendar, which runs on the server and regularly intercepts calendar events.
The syncing occurs through the Employee's Email, User Name and Password. The employee's 'Google' Email address, user name and password must exist in the Advantage Employee maintenance file. The option to synchronize an Employee's calendar with Webvantage calendar is set in Advantage | Maintenance | Accounting | Employee - Alerts & Settings tab.
Appointments created in either calendar are synced incrementally based on the settings in the Advantage Services and are available immediately after that action has occurred. This may require refreshing the Webvantage Calendar page if already open.
Modifications to shared appointments (Edit / Delete) are also synced using the same method.
Appointments in the Webvantage Calendar can only be edited by the employee who they belong to.
Once
Advantage Services/Google Calendar is installed, to access / close
Advantage Services double
click on the (Advantage Services) icon
(on the desktop) to turn on the Advantage Services. The
icon will
now be in the
notification area of the window’s
taskbar. Right
click on the icon to select Show Log
and Settings and
select the  Google
tab.
Google
tab.
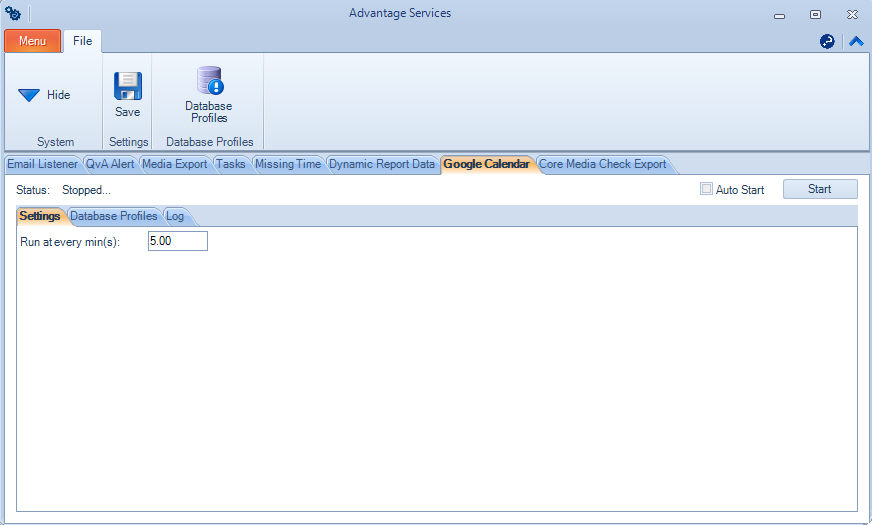
Status – Displays the current status of the Google Calendar service.
Auto Start – Select this option to automatically start the Google Calendar when Advantage Services is opened. This option is only available when the Google Calendar has been stopped
Stop / Start – To stop the Google Calendar, click the Stop button. The button will now be a Start button. To restart the Google Calendar, click the Start button.
The Settings tab is used to set the criteria for the Google Calendar service.
Run at every min(s)– Enter how often that the Google Calendar synchronization should occur. The entry is automatically saved.
Once databases have been added for general use using the Database Profiles button on the toolbar, select the ones that will be used with the Advantage Services.
To select a database for the Advantage Services click the Select button. The Database Profiles popup displays all databases that have already been added to Advantage Services. Highlight the database to be added and click ‘Select’. The option to edit and remove a database is also available.
Edit - To modify an existing database, on the Database Profiles tab, highlight the database and click the Edit button.
Remove - To remove an existing database, on the Database Profiles tab, highlight the database and click the Remove button.
The Log tab displays a running list of all the processes completed by the Advantage Services. The log entries are generated based on the Run at every min(s) on the Settings tab.
Setup